Benefits of a Home Compost Bin
A home compost bin turns kitchen scraps and yard waste into nutrient-rich soil. It reduces household waste and improves garden soil structure without chemical fertilizers.
Composting saves money, lowers landfill volume, and supports healthy plant growth. Small changes in setup and maintenance make composting practical for apartments, yards, or community gardens.
How to Start a Home Compost Bin: Quick Overview

Starting a home compost bin requires four basic steps: choose a bin, pick a location, layer materials, and maintain balance. This guide breaks each step into actionable tasks so you can begin composting this week.
How to Set Up a Home Compost Bin
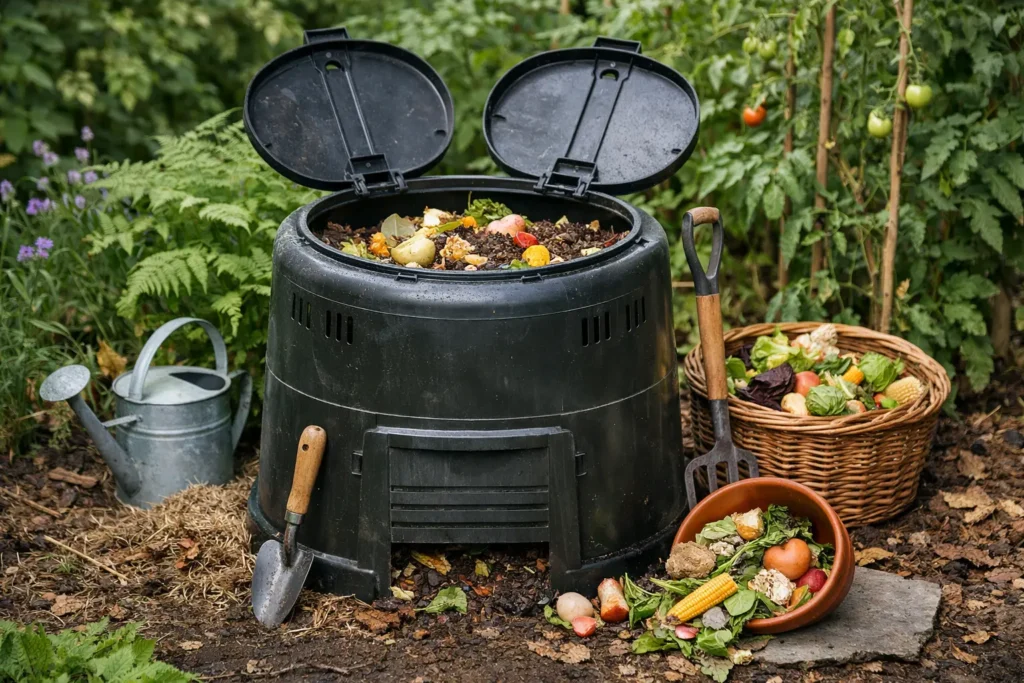
1. Choose the Right Bin for Your Space
Select a bin based on available space, budget, and effort level. Options include tumblers, open bins, and DIY pallets. A 50–100 gallon bin works well for most households.
- Tumbler: Fast turning and tidy, good for small yards.
- Open bin: Cheaper and simpler, requires manual turning.
- DIY pallet bin: Low cost and customizable for larger yards.
2. Pick a Location
Place the bin on level ground with some shade and easy access. A partly shaded spot keeps moisture balanced and reduces odors in hot weather.
Ensure the bin has contact with soil or a layer of coarse material so beneficial organisms can enter the pile.
3. Add the Right Materials
Compost needs a mix of brown (carbon) and green (nitrogen) materials. Aim for a ratio near 25–30 parts carbon to 1 part nitrogen by weight, but simple rules work well for beginners.
- Greens (nitrogen): Vegetable scraps, coffee grounds, fresh grass clippings.
- Browns (carbon): Dry leaves, shredded paper, straw, cardboard.
Avoid meat, dairy, oils, diseased plants, and pet waste in a standard home bin. Layer materials in 3–6 inch layers, alternating brown and green.
4. Maintain Your Home Compost Bin

Turn or aerate the pile every 1–2 weeks to supply oxygen and speed decomposition. If the pile smells, add more browns and check moisture.
- Moisture: Should be like a wrung-out sponge.
- Temperature: Active piles warm to 120–160°F (50–70°C), but a cold compost still works over time.
- Turning: Use a pitchfork or tumbler to mix materials and distribute heat.
Troubleshooting and Common Questions
Why does my compost smell?
Foul odors usually mean too much wet or nitrogen-rich material and not enough air. Turn the pile and add dry browns like shredded paper or leaves.
Why is my compost not heating?
Low heat can result from a pile that is too small, too dry, or lacking nitrogen. Increase pile size, add greens, and moisten to jump-start activity.
How long until compost is ready?
Finished compost typically takes 3–12 months depending on materials, size, and how often you turn it. Mature compost is dark, crumbly, and smells earthy.
Gardeners can reduce household waste by up to 30% by composting food scraps and yard trimmings instead of sending them to landfill.
Tips for Faster, Better Compost
- Shred or chop materials to increase surface area and speed decomposition.
- Keep a balanced mix of browns and greens to maintain structure and airflow.
- Use a thermometer to monitor temperatures if you want faster, hot composting.
- Collect kitchen scraps in a countertop pail and empty into the bin daily to avoid pests.
Small-Scale Case Study: Apartment Balcony Composting
Maria, a city apartment tenant, started a 20-gallon tumbler on her balcony. She collected coffee grounds and vegetable peels in a sealed kitchen jar and added dry leaves weekly from a neighborhood park.
Within four months she produced rich compost for potted herbs. She avoided odors by rotating the tumbler every few days and keeping materials balanced. Her herb yields improved and she reduced trash volume noticeably.
Using Finished Compost
Mix finished compost into potting soil or spread a 1–3 inch layer over garden beds as mulch. Compost improves soil structure, water retention, and nutrient availability.
Apply compost in spring or fall, and avoid placing fresh, unfinished compost directly against plant stems to prevent nitrogen drawdown.
Checklist: Start Your Home Compost Bin in One Weekend
- Choose a bin type and purchase or build it.
- Pick a shaded, level location with soil contact.
- Stockpile browns (dry leaves, cardboard) before starting.
- Collect greens from the kitchen and yard daily.
- Layer materials and monitor moisture and aeration weekly.
Starting a home compost bin is a low-cost, high-impact step toward sustainable living. With the right materials, a simple maintenance routine, and realistic expectations, anyone can turn kitchen waste into valuable soil in months.